How To Create A Card Catalog
I have always wanted a piece of furniture with a bunch of tiny drawers. When I was a child, my mom had a spice cabinet on the wall of our kitchen that I would hide all sorts of treasures in. As I grew up I wanted my boys to have something similar. What I really wanted was a card catalog. I have actively searched for one for one for about three years. The ones I found were either too big or too expensive. Every once in a while I would find a decently priced one on ebay, but then I would notice the shipping. The shipping more often than not was more than the price of the cabinet!
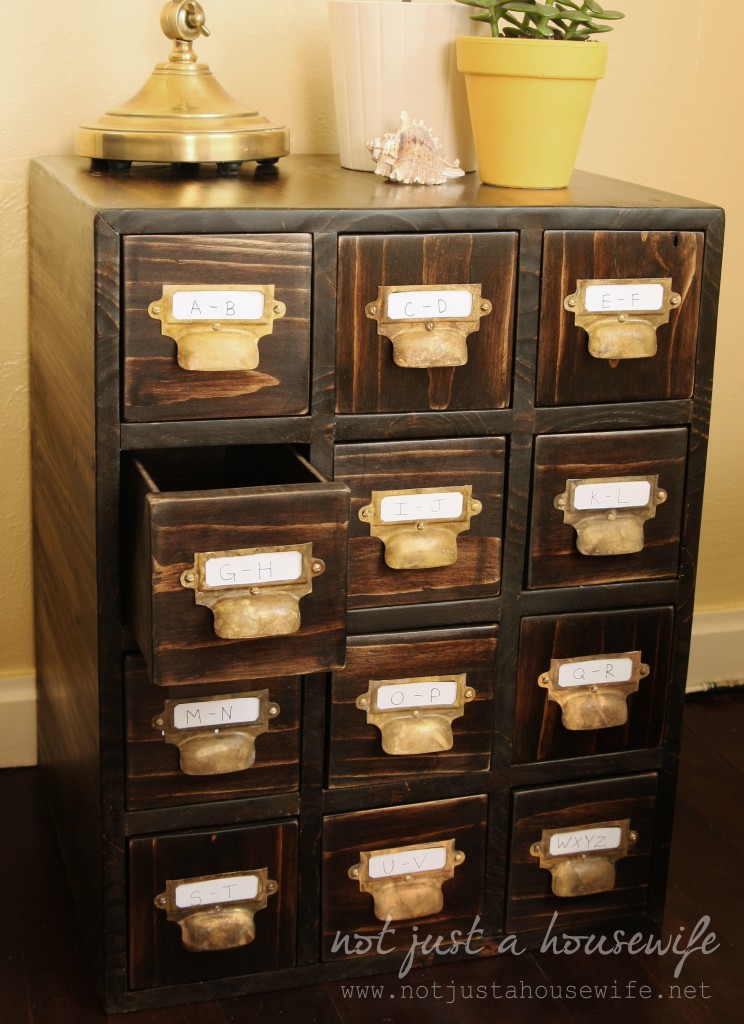
So when I was in the planning stages of my family room renovation, I decided to figure out how to build one and make it look like an antique.
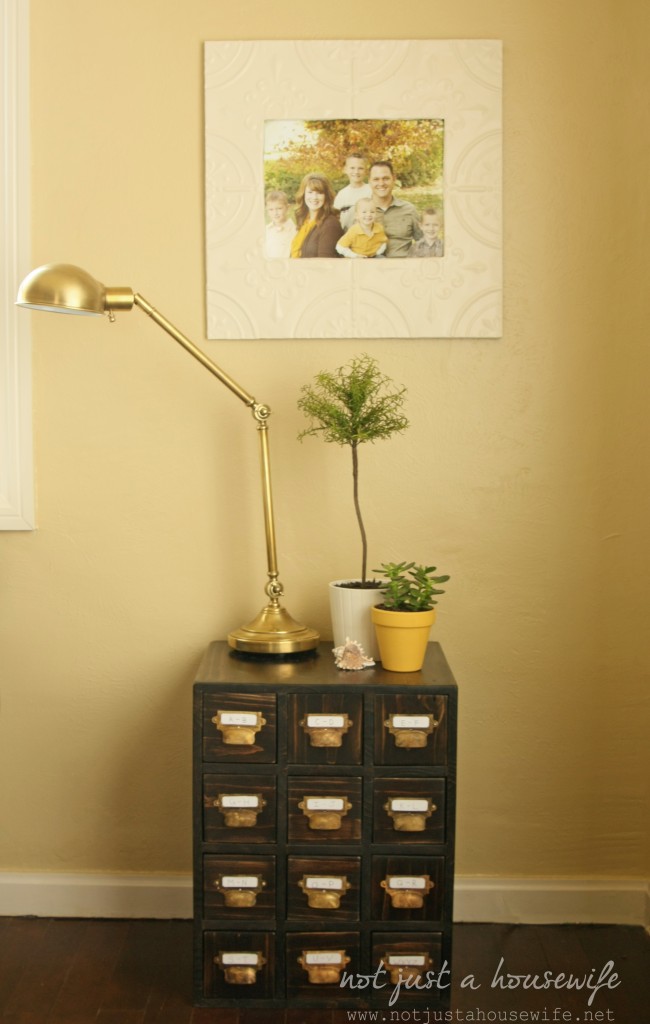

Before I show the tutorial, let me apologize for the crappy cell phone pics. I do a lot of my DIYing at night when my kids are in bed. Since I was doing this project indoors (because of record low temps this winter) it got pretty dusty in my dining room so I didn't want to pull out my nice camera. They won't win any photography awards, but you will get the idea :)
Supplies needed:
(affiliate links)
*Laminated Pine Boards
*18GA Brad Nailer
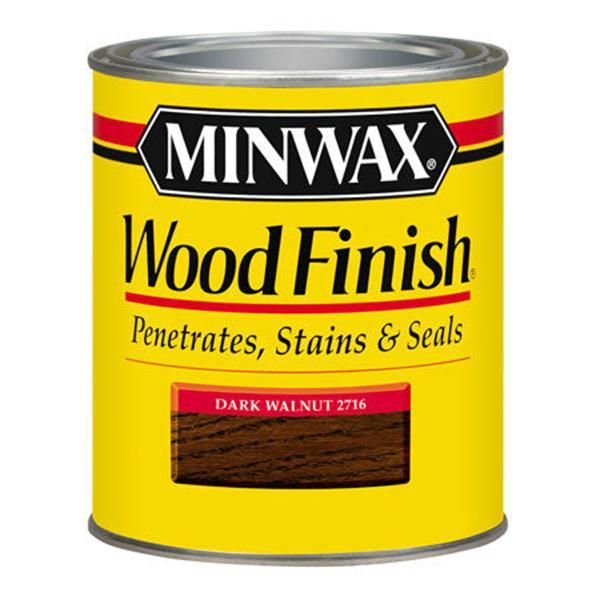
*Wood Stain, Dark Walnut
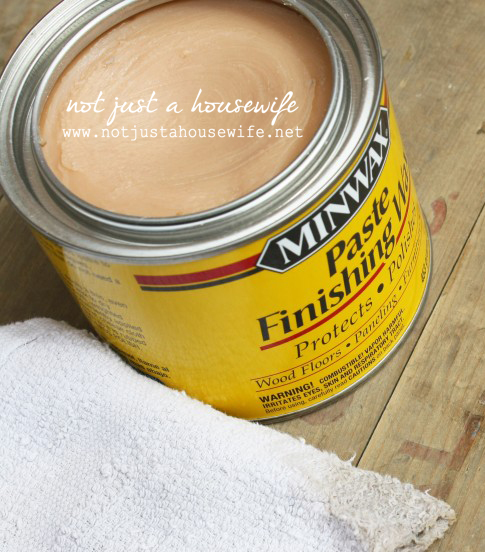
*Finishing Wax
*Label Holder Drawer Pull
The building.........
You basically start with a box. Make the dimensions fit your own space, but be smart and make sure with the size that you choose, you will have the least amount of cutting possible to eliminate extra work. For example...
I am old school. I should one day learn sketch-up or some other computer program, but for now I really enjoy just drawing out my ideas on paper. I had it all done. The dimensions, shopping list, cut list, etc. And then I lost it. I was pretty confident that I remembered everything so I went to the store and bought the lumber. I had remembered the width of the box being 18 inches. So that is how it was cut. But what it really was, was 18 inches on the inside of the box, not the outside. If I had made it 19 ½ inches like it was suppose to be, the 1x6 boards I was using for the drawer fronts (which due to planing/sanding are really 5 ½ inches) would have worked perfectly and I would not have had to cut them down. Instead, I ended up having to shave some off with a saw. Just something to think about when you are doing the math.
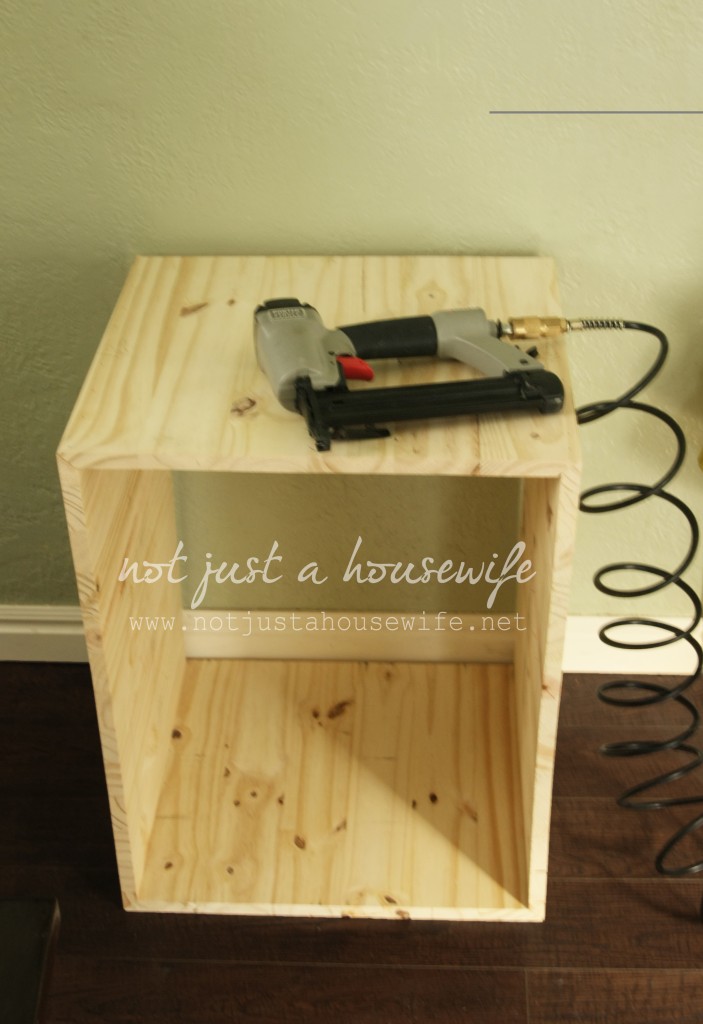
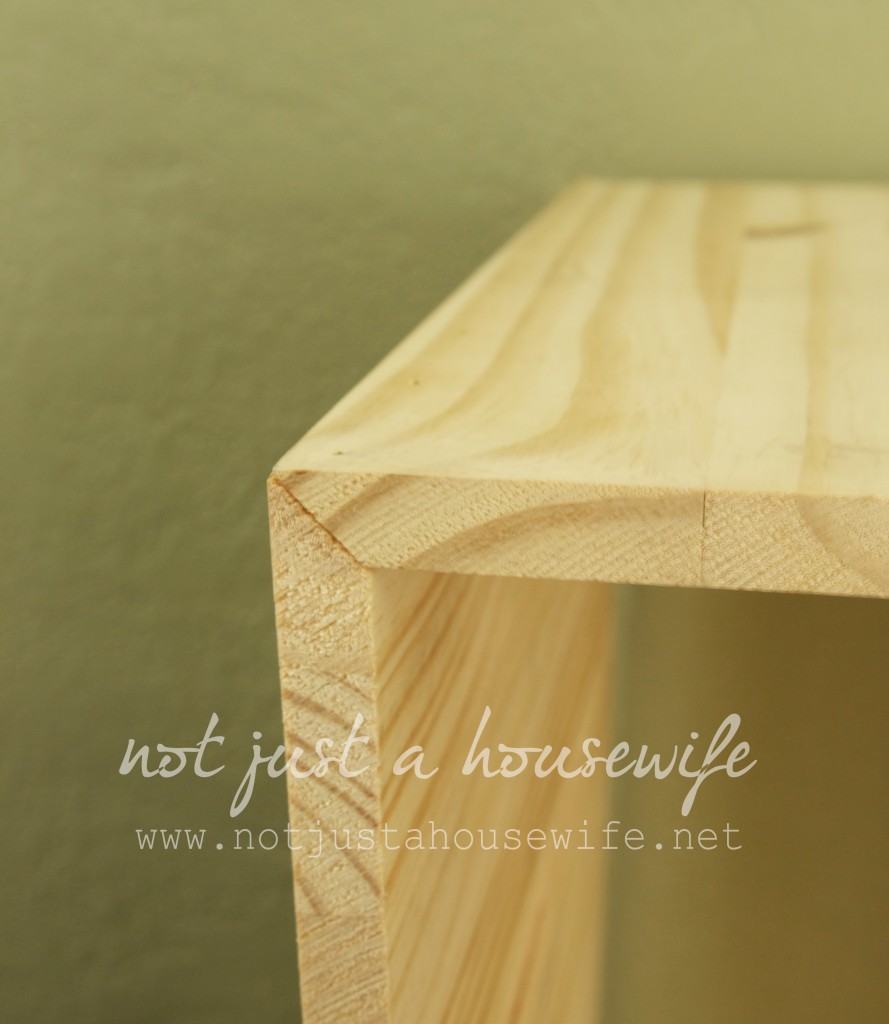
I went with a mitered joint since you would see the edges and because I was choosing to stain and not paint.
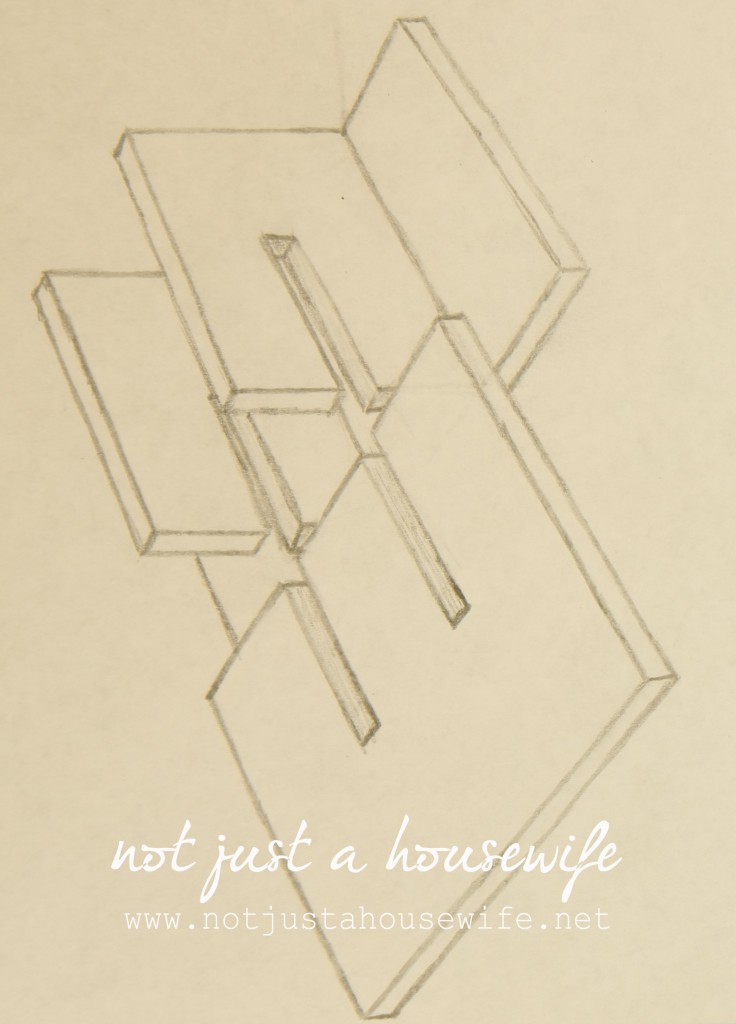
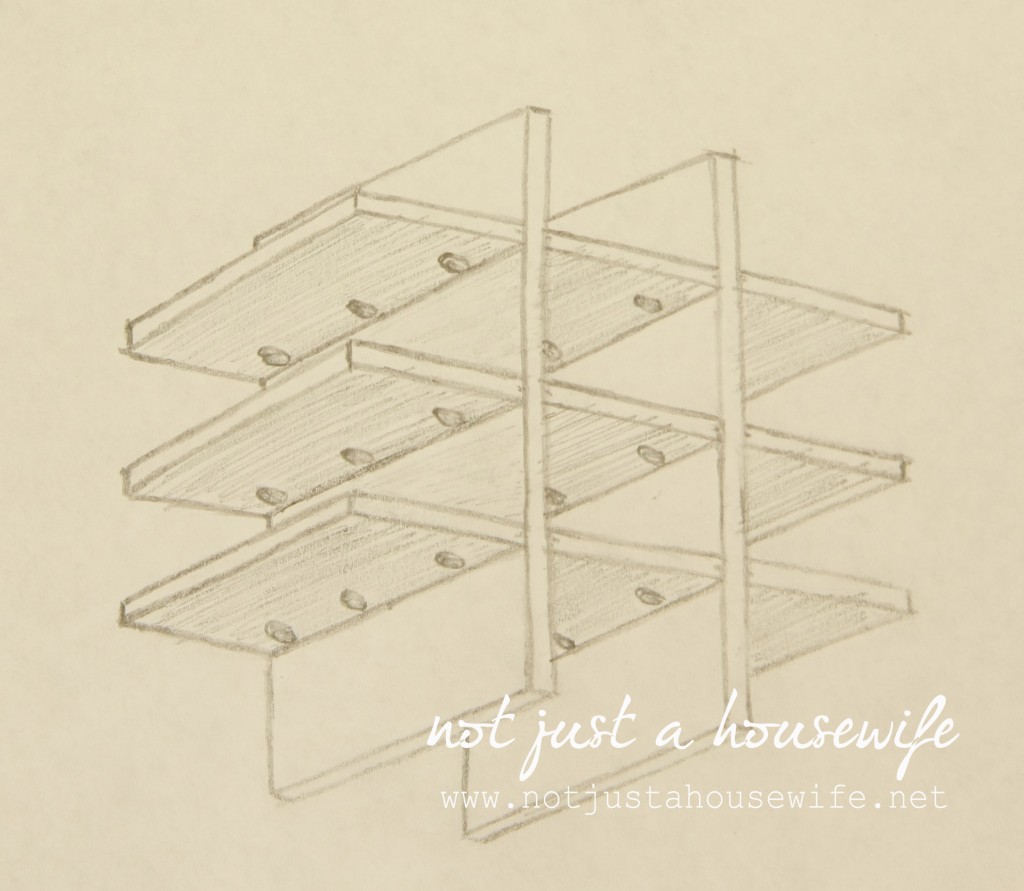
Then it is time to do the insert. You can do one of two things...
Here are some lovely sketches. The first is just like the shoe cubbies you can buy for cheap at Target or Walmart that you put together your self. There are notches that slide together.
The second way is to screw the pieces together using a Kreg Jig. I used one on the barnwoood cupboard I built awhile ago and you can buy a small inexpensive one like the one I have.

Here is a good look at the joint up close.
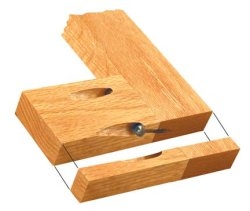 (image source)
If you go this route make sure and put the screws on the bottom so you will not see them. I know the drawers will be in the cubbies they create but it will just look better ( in case you take the drawer out) if the screws are hidden.
Okay, if you cut everything right your insert should slide right in. If it is too tight, just use a hand sander ( don't use a belt sander since they eat through wood VERY quickly) and sand it down a bit. If it is too small and there are gaps, then cut a thin piece of wood to act as a shim between the box and the insert.
Luckily mine was a perfect fit :)
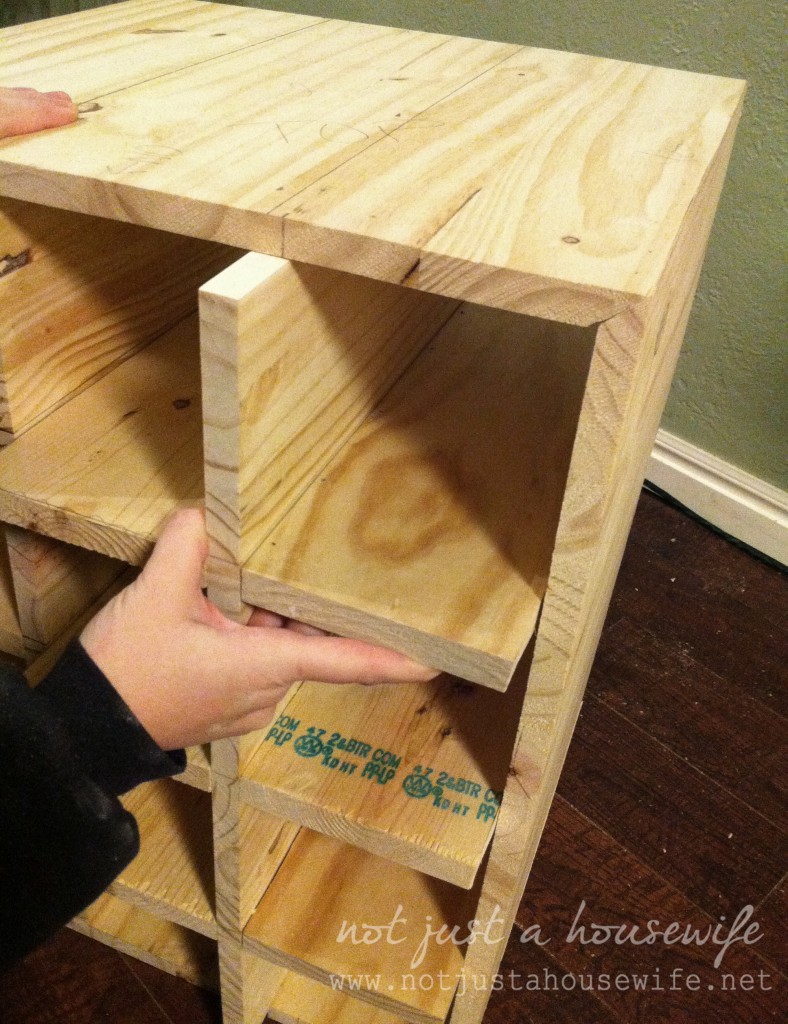
I then nailed it into place with my brad nailer. I draw a line across so I know where to nail.
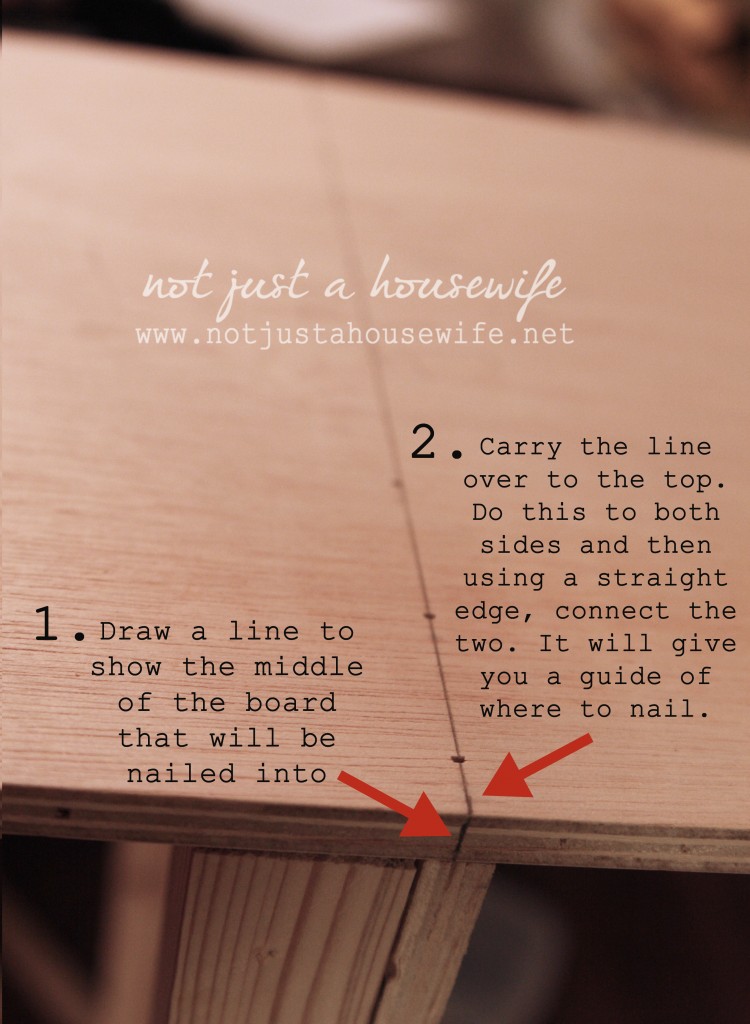
This was the easy part. Now on the the tedious job of making all 12 drawers!
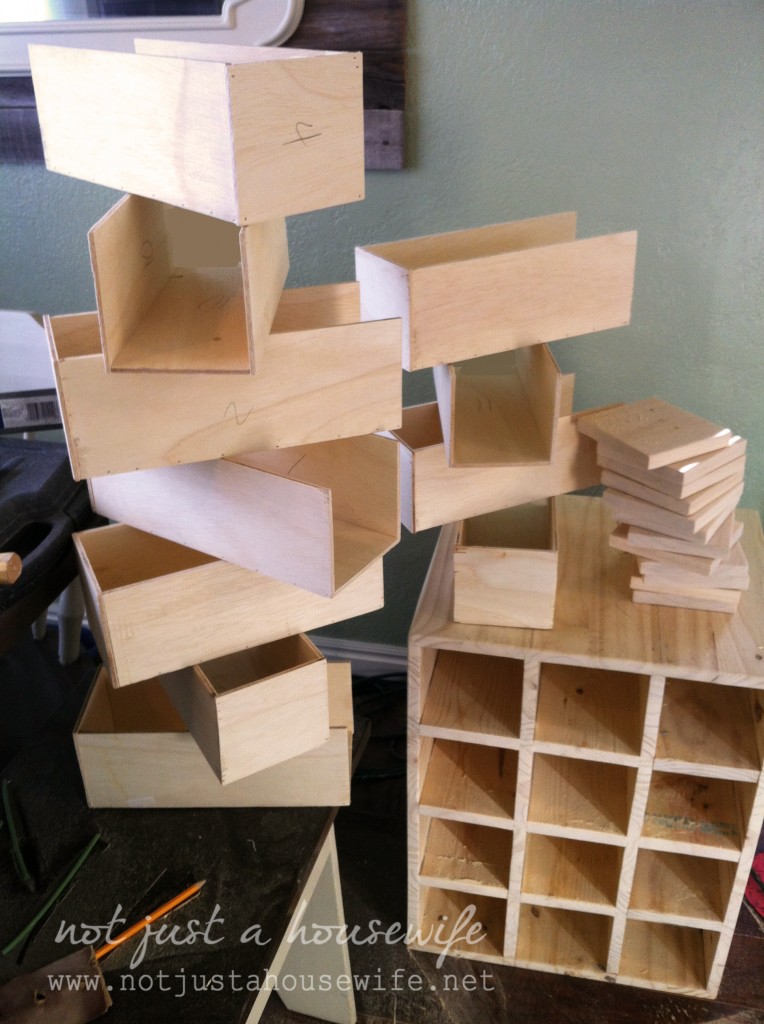
I cut all the the wood except for the plywood I used for the drawers. Home Depot will cut wood for you so to cut down on my work load I decided to have them rip cut the ply wood into 4 ½ inch strips. That way I just had to come home and use the miter saw to cut them to the right length. I do not have a table saw and this would eliminate having to mooch ask our neighbor to use theirs AGAIN.
I chose ¼ inch plywood because the thinner the drawer sides the bigger the inside of the drawer. That was my reasoning. I had used ¼ inch ply wood on my son's floating side table drawer and it worked out pretty good. BUT I will say that it is very hard to nail the brad nail into such a thin board without it missing. I would recommend using ½ ply wood for the drawer sides, back and bottom.
I wanted the drawer to be shallower than the cubby it was going in so it could have some wiggle room. You don't want it to be the same height or it will get stuck easily.
I cut the drawer fronts one at a time. I measured each individual cubby, then cut the drawer front for that specific cubby, and then labled it with a number. There are bound to be tiny imperfections ( something bog ones) so even if it only off my a 1/16th or ⅛th of an inch, it will look better if you cut them one at a time to have a nice fit.
I knew I was going to be sanding mine quite a bit to make it look aged so I was okay if the fit was a little tight. If you want to sand it, keep that in mind.
As far as how I got the drawer fronts to be nailed on with out too many nails missing their mark, I hot glued a tiny dot on each drawer and stick the front on. Once it was stuck, I drew a line (like shown above) to know where to nail. The thicker the wood the bigger the target and the less likely you are to have a nail miss. That is why the ½ inch would be easier.
I puttied the crap out of it. I always add more than maybe what I need because you can always sand it off, but that way you don't have to go back and add more. ALWAYS use a paint-able, sand-able, stain-able putty. And pick the color closest to the color you will be staining. Especially if you are going to stain.
The staining.......
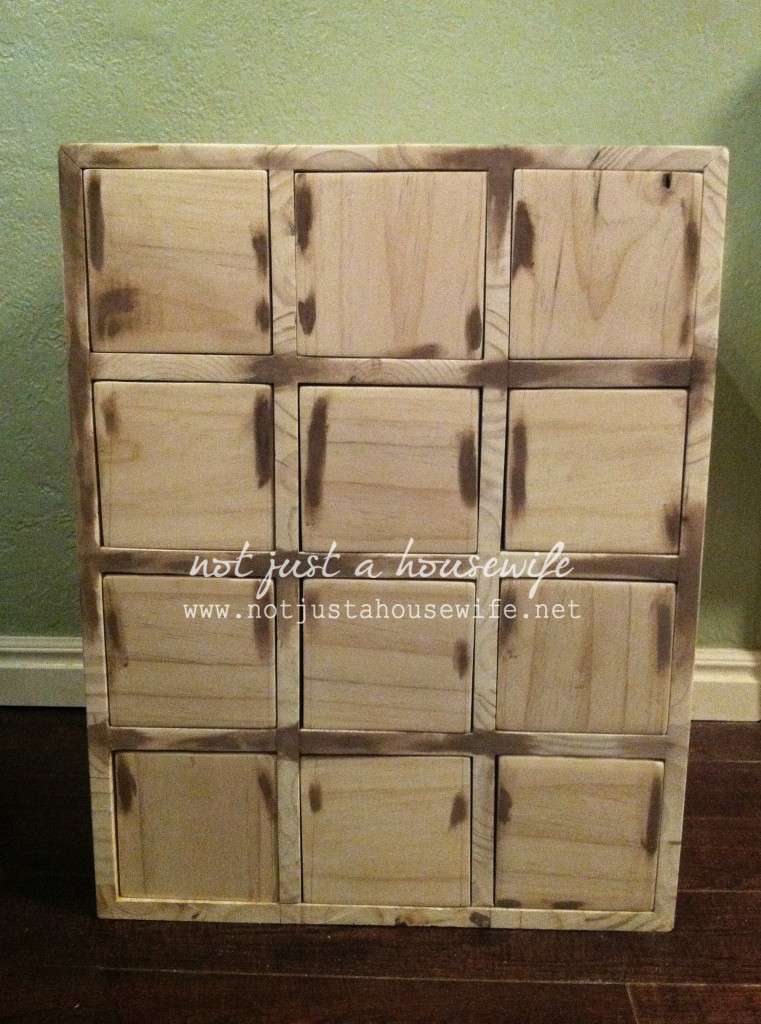
I wanted it to have an aged look. It is easy to get an aged look if you paint something. You either sand it or you glaze it (or both). Aging something stained is a whole other ball game. If you look at a real antique, it looks almost rubbed off. It is smooth and lighter in those areas. I had actually never tried to age a stained piece so this was an experiment for me.
I applied a thick coat of Minwax's oil based stain in Dark Walnut. (This method will only work with oil based stain. Do not use water based) Instead of following the directions and letting it sit for a bit and then wiping off the excess stain, I let it sit for quite awhile. I let it sit to the point of it being almost dry. It was sticky. And very dark. You couldn't see a lot of the wood grain. I then got a cloth and wiped it. I had to wipe hard and almost buff it because it was so sticky. And at first the fibers from the rag were sticking and I thought "Crap! What have I done?" But as I kept rubbing along the wood grain it began to get better.
I thought about the places that would normally get worn, like the edges, and the top where things would get set. I rubbed those areas more and it took off more stain. You have to play around with it. There were a few places I took too much off so I lightly brushed a little more stain over it and it was fine.
Once I got it to where I wanted it I let it completely dry over night. The next day I looked at it with fresh eyes and realized I wanted it a little more worn. Since the stain was dry at this point I got a very fine sand paper (220 grit) and ever so lightly sanded a few more spots. The sanding worked but didn't look as good as the other way.

I normally use Minwax's polyurethane to seal and finish off a piece but since I was going for a worn look and since antique stained pieces have a rubbed look, I decided to go with a wax this time. It requires a little more elbow grease to buff, but the look was perfection when I was done!
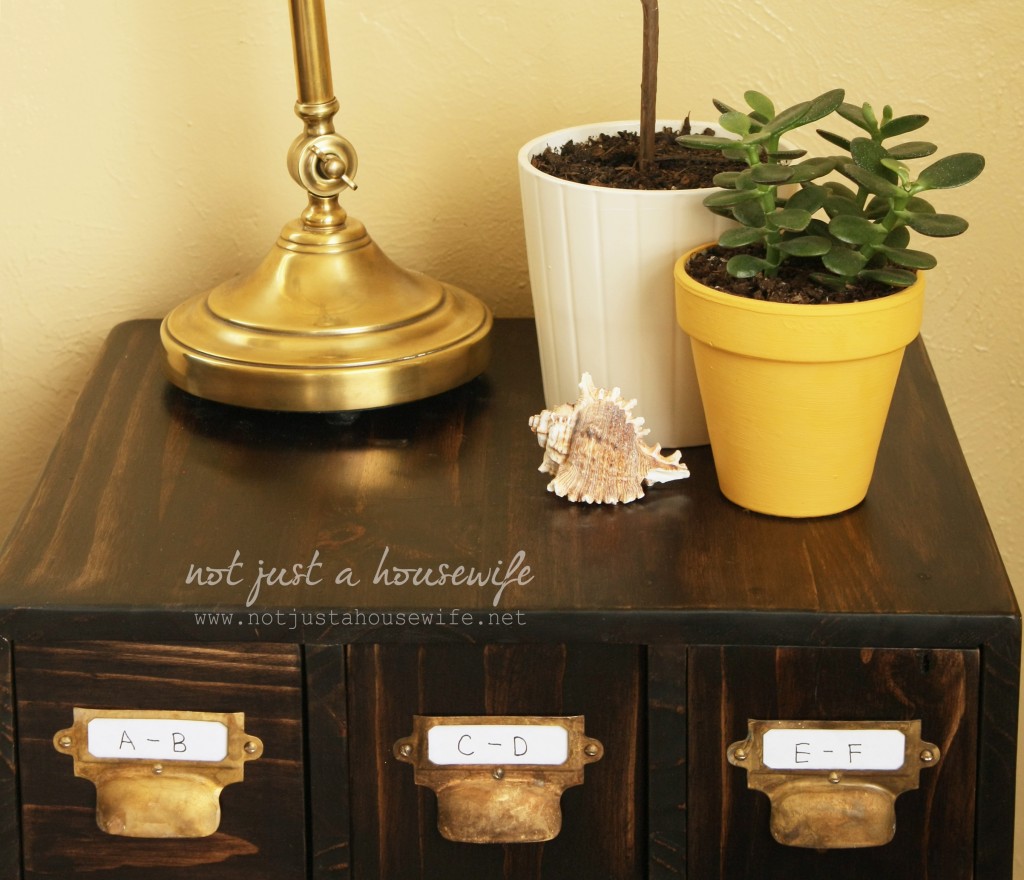
The hardware.......
I knew the kind of drawer pulls I wanted. I searched online and MAN! They were pricey. I needed twelve and I didn't want to break the bank. While I was searching for them I saw on my friend Beth's blog, that she had found the same style I was looking for at a really good price from a place called Van Dykes. I am not sure why or how the site works, but the prices vary all the time. I got the drawer pulls for like $1.20 each but today the price says $3.50 each and I think Beth got them for $2 something.
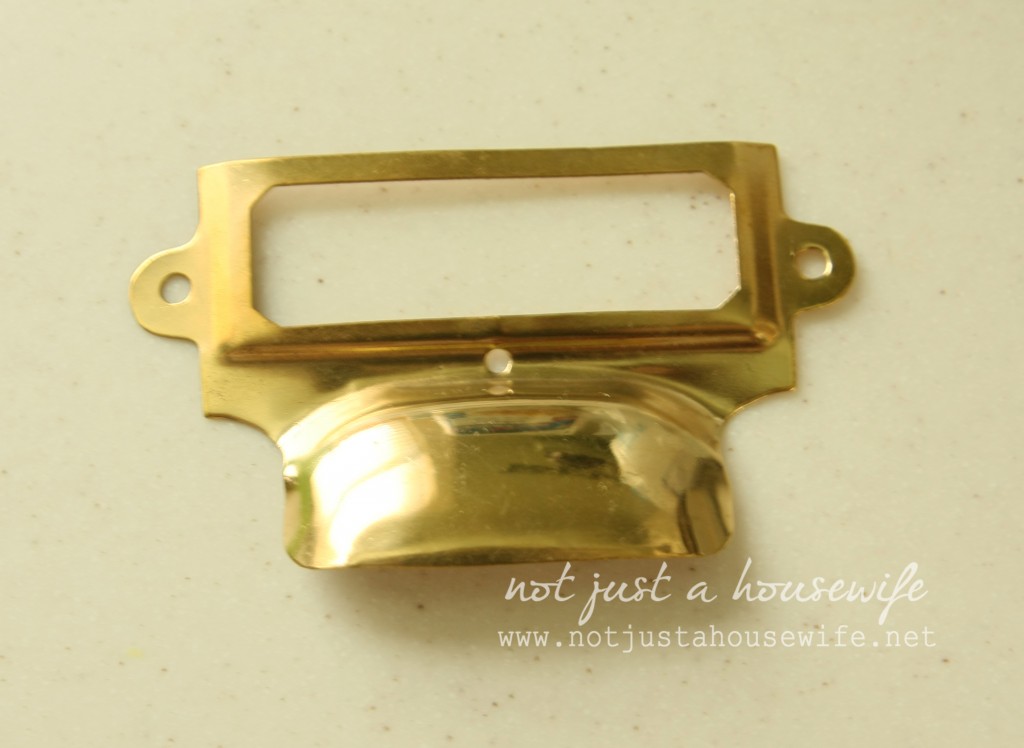
I knew they would be too shiny and new for my aged card catalog but I knew a trick...
A long time ago my mom told me about soaking metal in ammonia to age it. I did it for the first time about 10 years ago on the yellow side table in my front room. So I did it again for these.
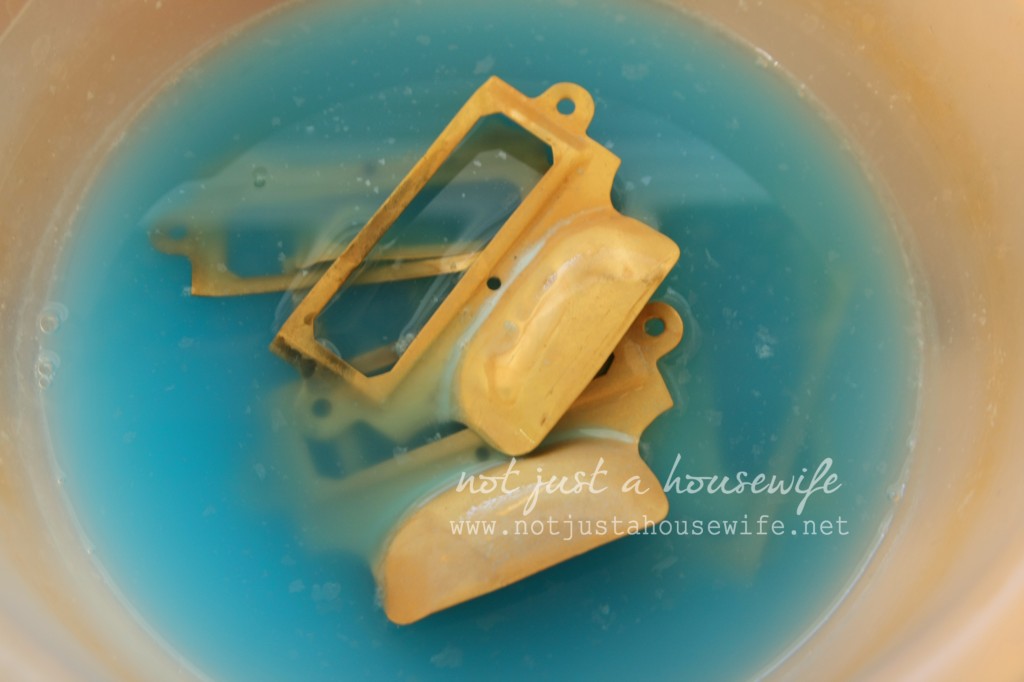
The first that will happen after a few days, is the clear ammonia will turn blue. Then clear coating will dissolve and they will look dull. After that is when it starts to get darker.
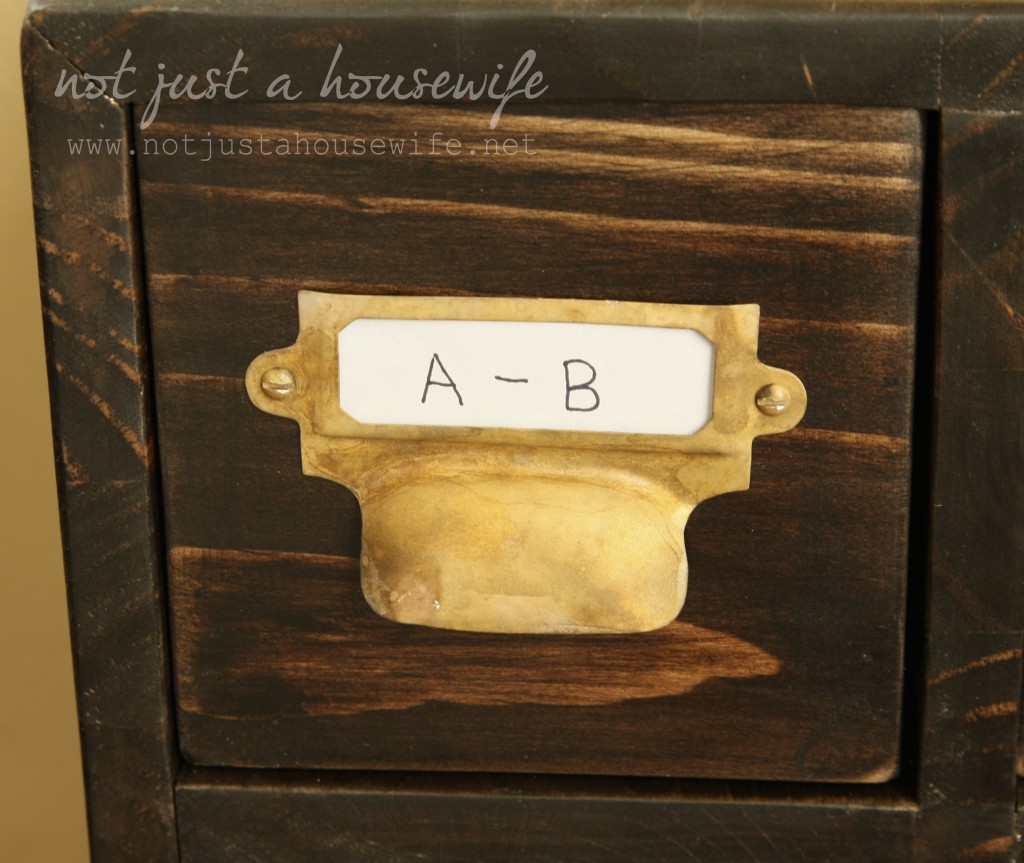
*A little tip ... If you don't watch it close and it goes too dark, then you can stick it in new (clear) ammonia for a few seconds and it will lighten. And if you lighten it too much you can stick it back in the blue used ammonia. BUT be careful how long you let it soak because eventually it will eat through the metal coating down to the real metal it is made out of. These pulls were made out of copper and a few of them have the copper peeking through.


How To Create A Card Catalog
Source: https://www.notjustahousewife.net/how-to-build-card-catalog/
Posted by: sandersfrethe.blogspot.com

0 Response to "How To Create A Card Catalog"
Post a Comment